
I recently participated in a virtual networking session. There were more than 40 people attending and we were broken out in to virtual rooms to give us an opportunity to meet as many different people as possible. After going around the room making our introductions a variety of interesting conversations took place before being called back in to the virtual lobby and being put in to a different room with different people
Over all, the experience was really great, fun too. I met some interesting people, learned quite a bit and found the 90 minutes to be a great investment.
However, I was surprised by the number of people who really sounded as though they were joining from a cave, even if their backdrops showed something different, offices, kitchens, lounges, home offices and blurred back-grounds.
The poor audio quality really distracted me from their introduction and contributions. This might just be me – I do have an interest in audio quality after all. From quality music playback (Hi Fi) to sound quality at gigs, both from the audience and as a band member.
And, after all, it does seem that audio is important, the BBC, ITN, Sky News et all seem to think so too – they know that poor quality audio distracts from the message.
So why do people settle for poor quality. I suspect there are a couple of main reasons, the main one being that they don’t know what they sound like. It could be that they are not concerned what they sound like or they simply don’t know how to over come it.
Most of the problems are with laptops and people using the built-in microphone. When we talk in to it, the microphone picks up the direct sound. But it also picks up all of the echoes (reverberation – aka reverb) from the hard surfaces in the room, walls, windows, doors and hard floors. These reverberations hit the microphone fractionally after the main sound and continue to hit the microphone as echoes from different hard surfaces that are farther away. They also hit the other hard surfaces and are reflected (again) back in to the mic. Which is why people sound like they are in a cave.
But why don’t they hear it themselves? Because our brains are really clever at filtering out this reverberation and only picking up on our own voice – which is why people don’t hear what their own room sounds like.
The expensive solution is to muffle all the hard surfaces with sound absorbent panels. If you are Zooming from your lounge, your kitchen or a spare bedroom you might not want to go for “Recording Studio” chic which makes the alternative far more practical can cost effective.
You need an higher quality external microphone that you can plug in to your laptop or desktop and place closer to your mouth, either on a boom stand or desk mount.
This is where it gets challenging because there are hundreds, thousands of microphones to choose from – so where should you start.
First off, if you only want it to improve the quality of your Zoom, Teams call etc then you can look at the lower end of microphones and go for a USB device that can plug straight in to your computer.
If you are thinking about making some videos, or recording a podcast you’ll want something better. If you are still looking to only record one voice then a decent USB microphone will still suffice but if you want to record two or more people then you’ll want a microphone each – for the best quality. You can still use USB microphones but you will need a device to enable to connect both of them to your computer. Alternatively you can invest in a small, desktop, mixer – this is really territory for my forthcoming “How to Podcast” eBook but I touch on the subject below.
USB Microphone Option 1 -Tie Clip / Lavalier Microphones

As used by news broadcasters the world over. A lavalier microphone discretely clips to an item of clothing and can do a great job of improving sound quality
This Movo M1 is a great example, and it’s only £22.95 on Amazon at the time of writing. It’s genuinely “Plug and Play” so all you have to do is plug it in and select it as the microphone you want to use when making Zoom/Teams etc video calls.
With a 6m cable it doesn’t matter how far you are away from your computer, either
As well as the mic you get a clip to enable you to attach it to your tie (hence the name “tie clip microphone” but you can clip it to lapels, shirts and blouses too), and 2 foam windshields to help minimise wind (and breathing) noises.
Yes, you can buy cheaper but I wouldn’t recommend it.
USB Microphone Option 2 – Dynamic Microphone
A dynamic microphone is typically what you’ll see used on stage, by singers, at concerts. They are robust and offer great quality. A step up from an inexpensive Lavalier. There are hundreds to choose from, from well established brands – such as Shure, AKG and Audio Technica – which guarantee great quality – to a myriad of no-name Chinese brands which have no track record and which I wouldn’t trust.
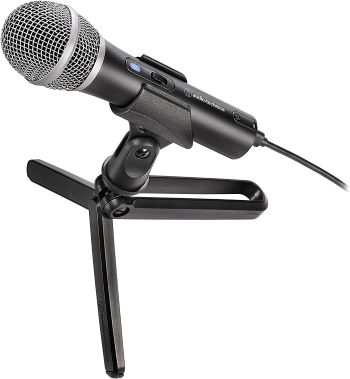
This is why I am recommending this Audio Technica ATR2100 – USB which is £59.30 on Amazon, at the time of writing.
It’s actually a bit of a bargain because not only does it have a USB connection but it includes a socket for headphone monitoring, and a headphone volume control. If you make the next step and start having guests and you start using a mixer and multiple mics you can also plug this in to your mixing desk using the built in, professional standard, XLR connector.
Helpfully, for desktop recording it also comes with a desktop stand and three cables. USB C to USB C (so you might be able to use it on your Android phone), USB C to USB A to connect to your computer AND an XLR cable to connect to your mixing desk,
USB Microphone Option 3 – Condenser Microphone

Condenser microphones (also called capacitor microphones) are the high quality microphones of the recording world. They can offer the best recording quality of all the microphone types so if you are really serious about recording quality then a condenser microphone is the one to go for, and yes, you can pay £thousands. But you don’t have too.
My current microphone that I have connected to my main PC, which I use for Zoom/Teams calls, and which I used for recording my first 150 or so podcasts is this Marantz Pro MPM1000U. Again, it’s a USB microphone, so it’s plug and play. At the time of writing, it’s £49.99 but I have seen it reduced to around £35.00 on many occasions. Sound quality is first rate and reliably has been superb.
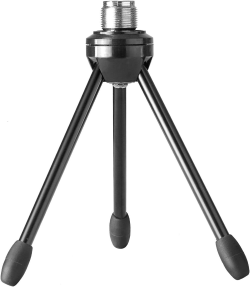
It comes with the all essential USB cable but to keep the cost down, it doesn’t ship with a desktop stand so you should factor in £20 or so for one, this Neewer is £16.49 at the time of writing. And you do need a stand because if you try to hand-hold the mic every time you change the way you hold the microphone the sound will be carried across to your call.
Microphone Accessories you might find useful.
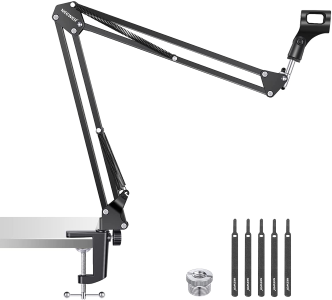
In my little Podcast recording studio I have a small mixing desk, so I can use two or more microphones, boom arms for my mics – so they can be pushed up out of the way when not in use and pop filters.
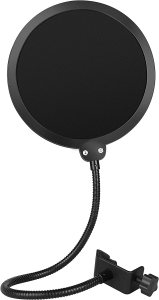
Pop filters help reduce the plosive consonants, those that are made when words start with a P, B, T, D, K and G. They all produce a puff of air. You probably won’t notice them but your microphone will and they can totally overwhelm your recordings.
I use a small mixer too. It extends the range of microphones you can use (and the number too) and can also add tone controls, adding (or removing) bass, treble and sometimes middle frequencies add sound effects, such as reverb, echo etc.
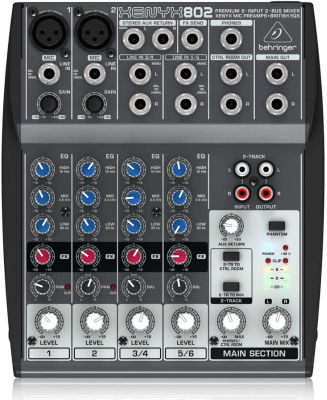
Again, there’s a myriad of mixers to choose from. In fact it’s a potentially confusing and complicated market if you are new to it. I prefer well established European and US brands for their proven track records and ability to get repaired should they break down. My current mixer is a Studiomaster, but I’d be more than happy with the Behringer you can see on the right if I were starting out.
I use my mixer with a selection of microphones, a non-USB Marantz MPM1000 condenser, my new Shure dynamic microphone, my old (and trusty) Shure SM58 – as seen on stage used by the majority of artists – and a couple of other microphones, two boom arms and two pop filters.
And on the mixer front, you won’t find one that will take USB microphones and if you choose to make a different choice, remember to look for one with USB outputs to make it easier to connect to your computer.
If you need help with your audio recording, or Podcasting, you can always get in touch. Email andy@enterprise-oms.co.uk, phone me on 01793 238020, call (or SMS) 07966 547146 or hunt me down on my Socials, LinkedIn and Twitter, and I’ll be only too happy to help.